Introduction
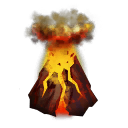
There have been reports of unusual seismic activity in Sector N26, at the foot of one of Africa’s active volcanoes. According to general information, it’s the location of some research centre, but that background doesn’t exactly check out with what we know. Not to mention that this place’s been frequented by no other than Ursula Ellis herself, one of the Blackwood heads. We doubt it’s a mere coincidence.
Satellite and UAV scans didn’t provide much insight, and as a result, the Warface squad has to be deployed to the area.
Mission
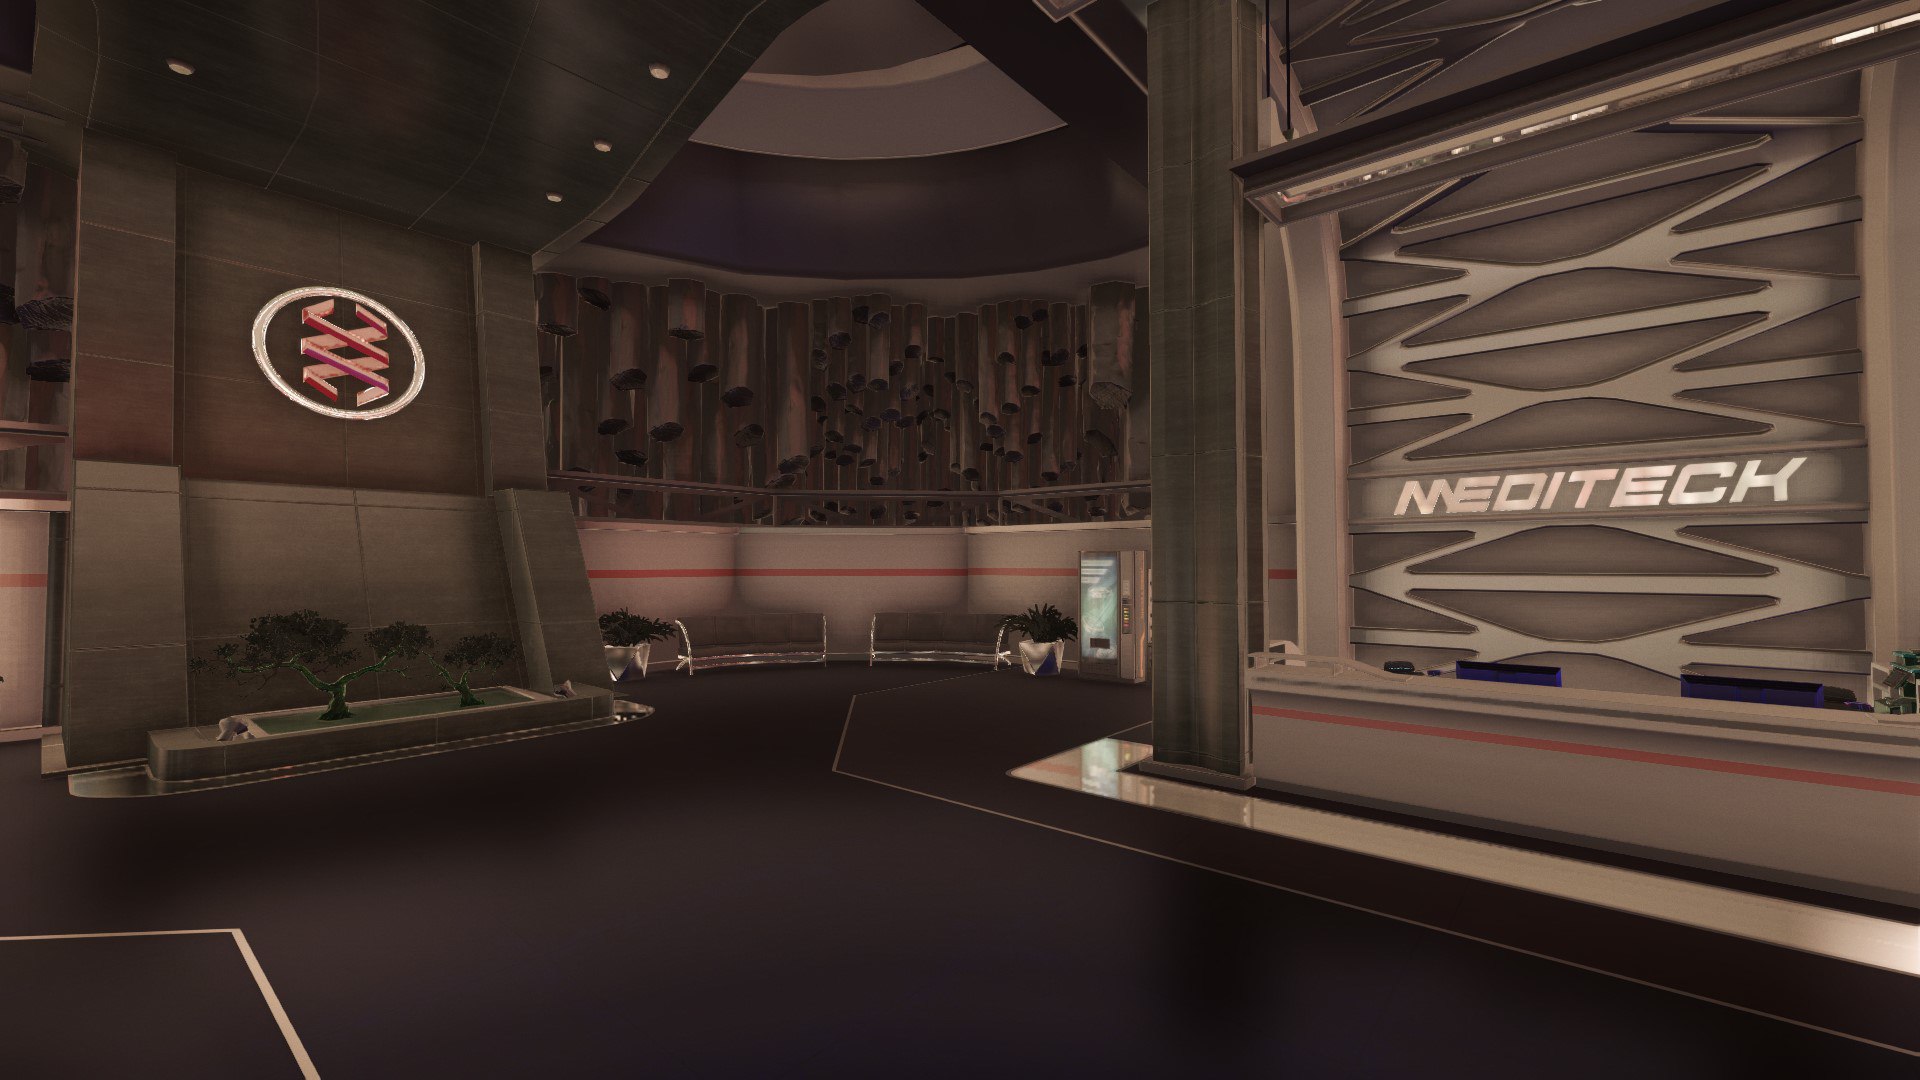
You’re going to scout the Meditech Solutions research facility situated at the foot of an active volcano. As you are inserted in a helicopter, it becomes clear even upon approach that hostile parties are awaiting your arrival – you end up in a crossfire. At the entrance, you are greeted with a message from ‘Ursula’, an artificial intelligence computer, responsible for the research facility defences.
Once you enter the building, defence protocols are activated and loudspeakers broadcast the instructions to leave the private premises, as the guards show up. However, you’ll have to go all the way through the premises until the very end.

The path ahead comprises 13 halls, and that’s where it gets interesting.

Apart from the regular troops you’ll meet new enemy types:
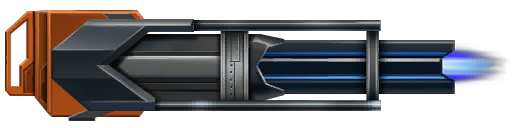
- Elite special forces units, well-equipped and armed with a prototype rifle FCG-R1 K1. You’ll yet get a chance to use this rifle closer to the end of the mission!
- Various turrets, described below.
In general, these are potent and dangerous enemies, capable of causing devastating damage at higher difficulty levels.

Each subsequent hall you go through gets harder; the color scheme displays the colors signifying the difficulty. The initial halls have green lights, up next the medium-difficulty stages are blue, and the hardest are red. Colors aren’t the only thing that changes – the lights are dimmed out more and more as you progress towards the end of the mission. The grand finale takes place in the dark.
Each hall is usually split into three, opening up one by one as you eliminate hostile forces. These sectors are approximately equal in difficulty.

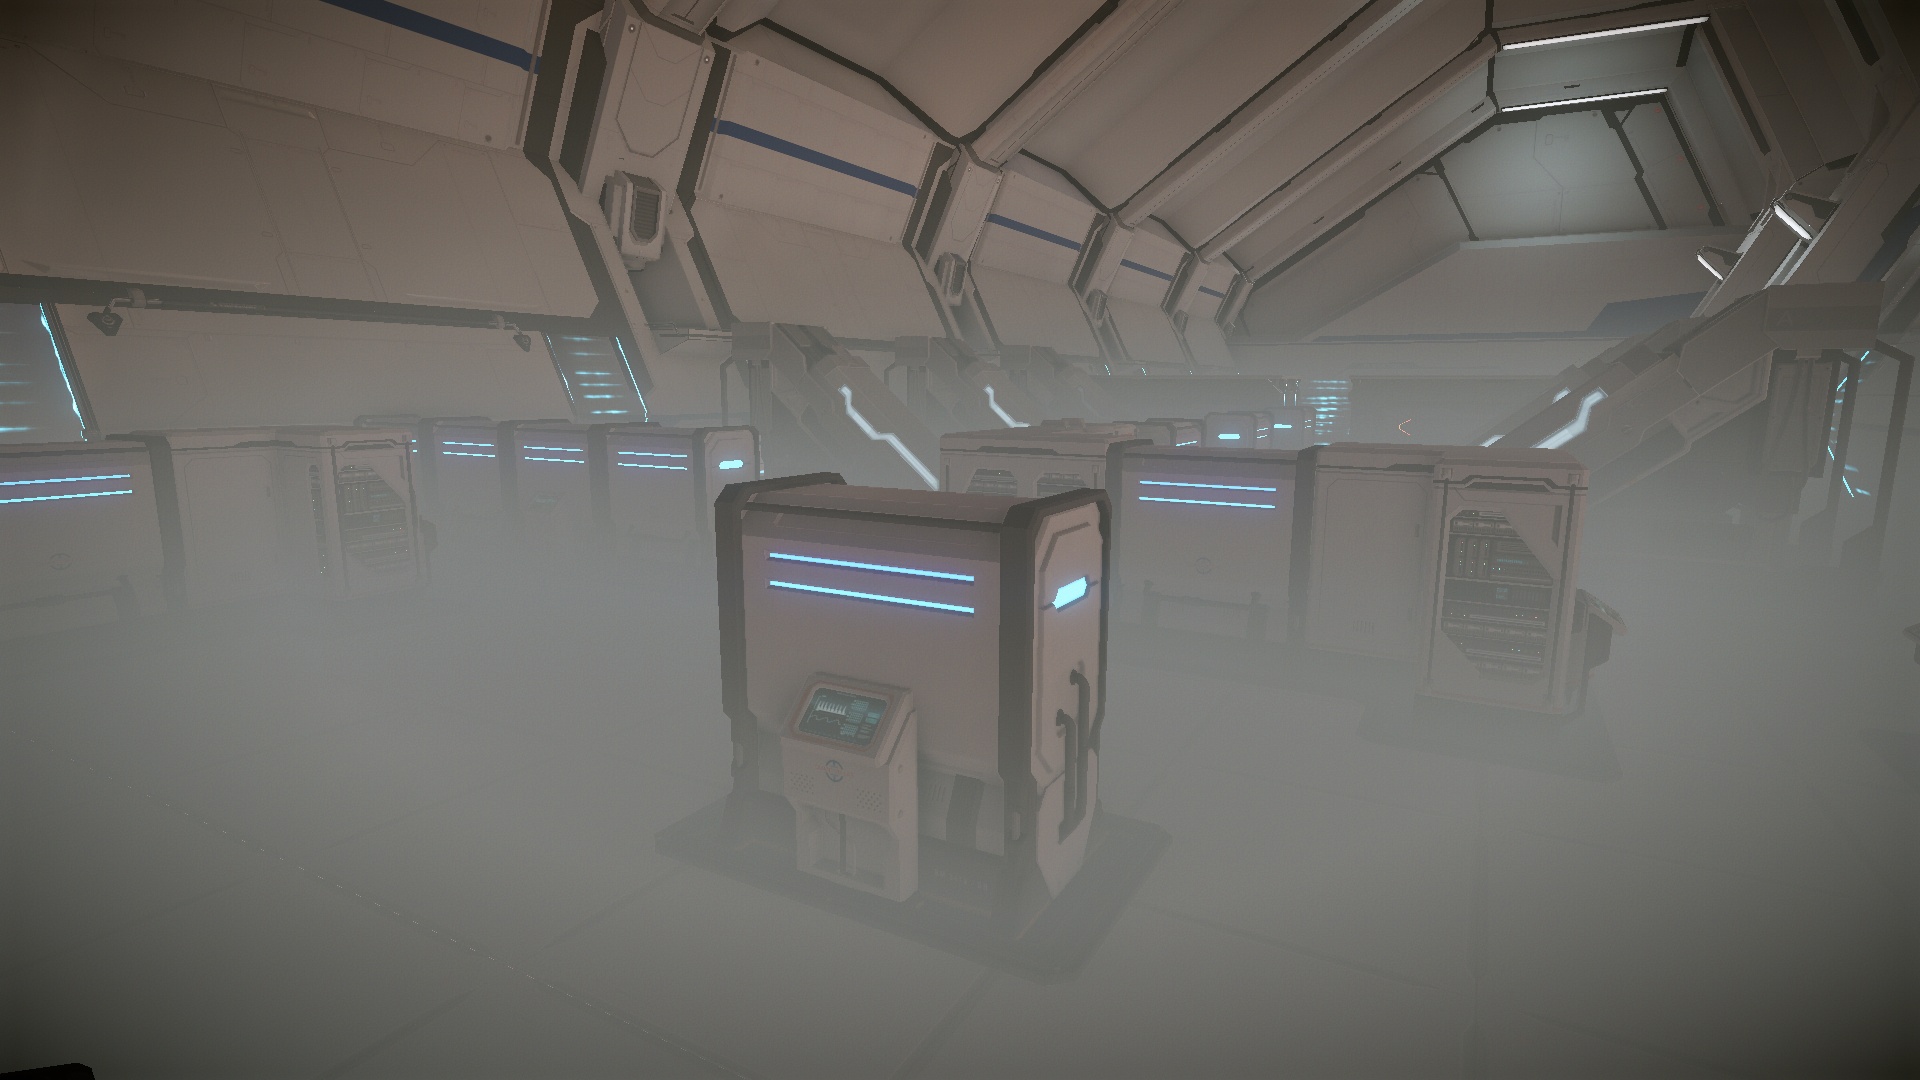
You will encounter open, empty halls, as well as unique rooms. For example, the server room filled with smoke, the hall with the bridge, etcetera. The farther you get, the more obstacles you’ll find in your way.
The Special Operation finale is the fight with Ursula – the most potent cybernetic enemy yet.
Difficulty levels
The special operation can be completed on four levels: ‘Normal’, ‘Hard’, ‘Insane’ and ‘Nightmare’. The operation itself and its stages stay the same, but get harder with each level: the damage you take, the amount of enemies, their speed and accuracy increase.
- The first level – ‘Normal’ – is the easiest. You get access to this level at the rank of 5. Technically, this level just introduces you to the mission and the game, so it won’t be hard even for an unprepared squad. Consider it a tutorial, watch and learn as the operation unfolds.
- ‘Hard’ is barely a tad more complex, but at this point, a team of newcomers may actually fail the operation. The level is unlocked at rank 5.
- ‘Insane’ and 'Nightmare' are an entirely different story, they challenge the most coordinated and prepared teams. One of the main difficulties you face is the turrets – if you fail to destroy two or three of those in time, they’ll wipe your team in a matter of seconds. And aside the turrets you face never-ending hordes of infantry. ‘Insane’ is unlocked at the rank of 10, and requires you to complete the mission on ‘Hard’ – just to show you how easy it was.
Enemies
According to intel reports, Blackwood’s installed various turrets throughout the base. We’ve faced some of them during the military campaign in the Middle East, but Blackwood scientists have come up with a bunch of new ones. Apart from the turrets, you’ll face various infantry units.
The base is guarded by various turrets: Cobra, Muraena, Mammoth, Armadillo, Hornet. Each of them differs in equipment, yet all of them are equally threatening and unforgiving towards an unprepared enemy. Some of these turrets are new so be on your guard.
After the initial 12 sectors of the lab, you will face the most dangerous turrets of all – Ursula.
Turrets
Cobra
|
This is your basic defense turret, operates much like a machine gun, firing in bursts. This turret’s outfitted with tough armor, so aim for the vulnerable – uncovered – areas. Don’t try to go head on against this one if you expect to survive. These turrets are employed in sectors 1, 2, 4 through 8, 11, 12, 13. |
Muraena

|
This one always comes unexpected, emerges from the floor. Prioritize this turret to survive the encounter. And watch your step! These turrets are employed in sectors 2, 3, 6, 8, 10, 11, 12. |
Mammoth

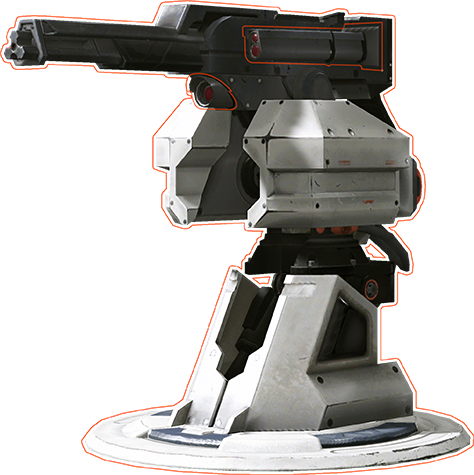
|
One of the most powerful turrets, Mammoth’s design is based on the concept of Heavy Fighters – frontal armor is practically impenetrable, and its heavy gun suppresses any foe. It’s practically impossible to destroy it alone. Its weakness is the power core on the back – flank it and destroy the core! This turret is employed in sector 11. |
Armadillo
|
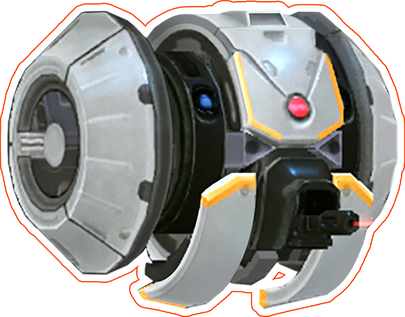
Wall-mounted and mobile, this turret is equipped with a built-in light machinegun. Its power core is situated on the floor, right behind the shield. The best way to take this turret out is to toss a grenade right into the hatch! These turrets are employed in sectors 6, 7, 11 and 12. |
Hornet

|
This turret is equipped with a powerful semi-automatic gun, capable of killing you with one shot even at long ranges. Pick a perfect moment and strike! These turrets are employed in sectors 3, 6, 8 and 10. |
Ursula
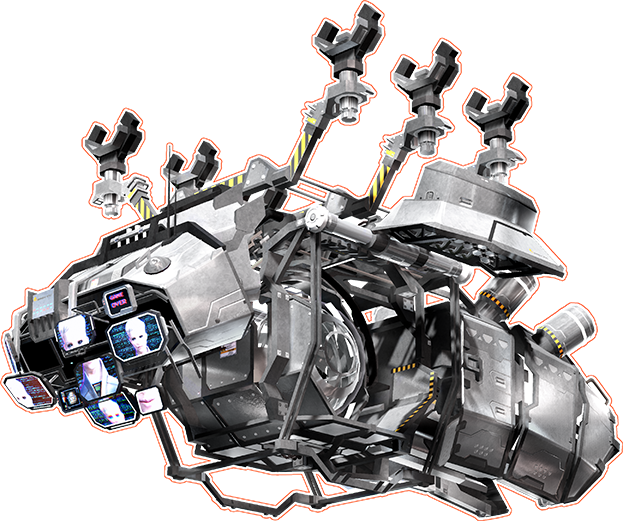
|
The pinnacle of Earth Shaker’s defense system. It’d take an entire squad to destroy this turret. Its core is vulnerable during transformations – use the energy-powered rifle FCG-R1 K1 to deliver fatal damage. Ursula is the final boss guarding the thirteenth sector. FCG-R1 K1 is a prototype of an energy-powered rifle, designed by Blackwood. It is capable of delivering immense damage, yet takes time to reload. It functions much like a bolt-action rifle, and is equipped with a 1.2x collimator sight. The magazine takes up to 40 rounds, and you can carry a total of 160. These munitions are restored only upon using a resurrection coin. This rifle is available only in the final fight in ‘Earth Shaker’. |
Achievements
|
Complete the Earth Shaker mission on normal difficulty |
Destroy 500 turrets in the Earth Shaker mission |
|
Perform 1,000 headshot kills in the Earth Shaker mission |
Complete the Earth Shaker mission without dying on insane difficulty |
|
Complete the Earth Shaker mission on hard difficulty |
Destroy 100 turrets with a pistol in the Earth Shaker mission |
|
Kill 5,000 enemies in the Earth Shaker mission |
Destroy 50 boss turrets in the Earth Shaker mission |
|
Complete the Earth Shaker insane mission as a Rifleman |
Complete the Earth Shaker insane mission as a Medic |
|
Complete the Earth Shaker insane mission as an Engineer |
Complete the Earth Shaker insane mission as a Sniper |
|
Kill 10,000 enemies in the Earth Shaker mission |
Perform 500 melee kills in the Earth Shaker mission |